A straight skirt coordinated Sorbonne
This tutorial is the first part of a coordinated set made in jeans with elasticity. I chose this type of jeans to add comfort, even if the whole look remains straight that will allow you to have more freedom of movement. On the other hand, if you want to make it in raw jeans it is completely possible, and I advise you to add 1cm to your sewing values on all your pieces in order to add ease.
La Sorbonne, a place of culture and scholarship, the oldest university in France, which helped to forge the most brilliant spirits in Europe. This whole story permeates buildings, it is a privileged place of knowledge, from the 13th century to the present day. But today, this is a much more recent era that I want to tell you about, the sulphurous period of May 68. It is indeed in the courtyard of this school that the first demonstrations took place. For this new tutorial, let your hair fly in the wind, and prepare to stir on "Mrs Robinson" by Simon and Garfunkel. We fly to the late 1960s!
Supplies :
- 1m x 145cm of Cotton Jean’s, 3 meters at 15 €
- A coil of matching threads
- A sewing needle
- A pin box
- 2 pressing buttons
- 1 25cm zipper
- A tailor chalk
- A thimble
- A pair of scissors
- A rule / square
- A sewing machine
- A press footing for zipper
- A straight skirt of your wardrobe

During this tutorial I use the term "pan" to define one of the pieces of your skirt. This corresponds to the part of the skirt that falls back on the front.
Step 1: Draw and cut your pieces:
1- On your fabric folded in half, lengthwise, put your skirt, also folded in half (on the back) and pin it to it (1).
2- Then draw the outline of your skirt on the fabric (2). Remove the skirt from your fabric. Now we will define the length of your skirt. My model measuring 1.62m, I decided that the skirt would be 45cm long starting from the top, because I want it to stop in mid-thigh (3). You can nevertheless make it shorter or longer depending on your desires and size. Cut this piece, leaving 1cm of seam at the top and 1cm of seam on the side (4).

3- Cut this piece a second time for the back (1). To trace the pan of the front of your skirt folded in half your piece in front. Once it is done, shift the fold on 5cm to the right, as presented in the image and pin so as not to lose the measurement (2). Place your piece on your fabric folded in half and cut your pan in front twice. Remember to add 1cm on the middle line, this will serve as sewing value.
4- Now all you have to do is draw the parmen. Take the upper imprint of your skirt and draw a straight line 6cm from the top (3). Cut this piece 2 times (4).

At the end of this stage you should end up with 6 pieces.
Step 2: Assembly:
Before starting to sew I invite you to overcome or make a zigzag point on your pieces, except at the bottom of the skirt.
5- Start by placing the press pimples on the pan and the front of your skirt. Place the first press button 2cm from the edge, and place the second at 4cm from the first button (1). I advise you to put the buttons on your pan first and then mark their location by placing your piece on the front of your skirt against the place (2). Sew the external part of the button by hand on the section of your skirt (3). Then always by hand to place the internal part on the front of it (4).

6- Assemble your two sides in front of the right place, assemble together the seams in front and the top (1). Turn your piece over and iron the seams (2).
7- Send the front and back of your skirt together to 1cm on one of the sides only (3). Do the same operation but this time on the parmentation and on the corresponding side seam (4). Iron the open seams.

8- Assemble the skirt together and the parment with a seam at 1cm (1). You can already turn your parment to the inside and go back so that it takes the desired shape well (2). Set the pan to the back side seam with a seam at 1cm (3). Pin the zipper as presented below and sew 1cm from the edge, being careful not to sew in the closure claws (4). Also remember to stop a little before the end of the closure. To help you you can also move the cursor when you sew, so that it does not block you. Repeat the operation on the other side.

9- Once the zipper is placed turn over and go back to the top so that it remains in place (1).
10- Close the bottom of your seam by again making a 1 cm seam going up to the point where you stopped during step 7 (2). Iron this open seam. You can, if you wish, endeavor this seam, especially at the Pan (3). All you have to do is make a point on the side line where you have not laid the zipper, in order to connect the skirt for the skirt so that it remains in place.

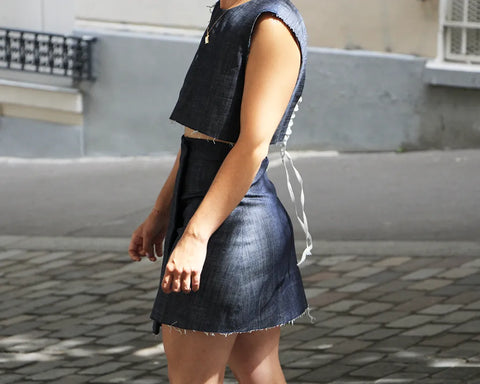
And now I suggest you see this little skirt worn and photograph outdoors to enjoy the last hot weather for this summer!


And of course as we are talking about a coordinated look here are some photos and a video that will allow you to discover this moving look!