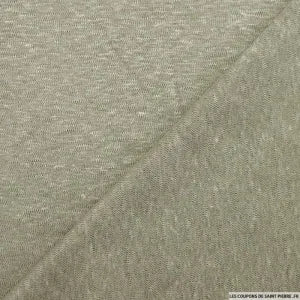
The top St Michel in linen mesh
The linen mesh is a thin, light and breathable mesh, perfect for creating small summer tops. Linen is the oldest textile in the world; Ecological and natural, this prestigious fiber has ideal thermoregulation properties for the summer. Absorbent and resistant, the linen mesh will allow you to make summer and trendy creations!
Discover The new collection of 100% linen mesh at the house of Saint Peter's coupons With more than 15 colors, the 3 meters at 20 €. We did not resist the urge to make a tutorial to sew the top Saint Michel, your little tied top of the summer! Learn in a few steps to make a V -neck, and a game of triangles to tie to belt your size. We invite you to create your own top pattern from a commercial t-shirt at your size in less than 2 hours! Up to you !
SUPPLIES
- 1m x 140cm of 100% linen mesh, 3 meters at 20 €
- A box ofpins
- 1 wire coil matching your fabric
- Stretch needles
- A tape meter
- A pair of Fiskars scissors
- A sewing machine

THE EXPLANATIONS
Create your top boss
1. Select a t-shirt to your size and fold it in half on your fabric previously folded in half, right place.
For the back, using a tailoring chalk draw the outline of your pattern, leaving 1cm of more sewing margin. For the shoulders, add 8cm from the shoulder line and go down down the sleeve.
2. For the front, fold your t-shirt in half on your fabric previously folded in half and draw the outline of your t-shirt by adding 1cm of sewing margin everywhere. Then dig the collar by making a diagonal from the top of the neckline to the center of your t-shirt with a height of 20cm, as indicated on the diagram to create a V-neck. You can adapt the depth of your neckline according to your desires .
3. Cut your two boss's parts according to your landmarks to obtain a piece in front and a back room.
4. Cut 4 basic isosceles triangles 12cm on a height of 35cm.

Assemble the top
5. Spin the two large sides of your triangles against the place.
6. Make a seam 1cm from the edge by selecting on your sewing machine the stretch point (small lightning) by testing beforehand on a fabric fall so that the point is clear.
7. Return the triangles by the base left open.
8. Position your triangles on the place of your top at a height of about 35cm from your shoulder line. You can adapt according to the height of your natural size. Make a sewing point 0.5cm from the edge to keep the triangles in place.

9. Position your front and back on the background and pin on the shoulders and on the sides. Then sew at the stretch point 1cm from the edge. You can surfing if you have an overhead or sew the edge of your fabric at the zigzag point to prevent the fabric from getting tos.
Sew the V -neck
10. We now go to the V -neck stage, but you can also create a round neck if you wish. Measure the outline of your collar, then cut a strip of fabric in your drops of width 6cm and length of the measurement of your collar minus 20% (depending on the elasticity of your fabric).
For our example, the surrounding area measures 62cm so the neckline will measure 50cm (62cm -20%) on a width of 6cm.
11. Assemble the place against the little side of your band to create a circle. Then bend against your band and make a seam 0.5cm from the edge to keep the band in place.
12. Uniformly pin the neckline strip against the place by pulling on the neckline to extend it to the length of your collar, taking care not to shoot your t-shirt so as not to deform the cleavage.

13. Make a seam 1.5cm from the edge, to obtain a visible neckline of 1.5cm and then turn your neckline to check that no folds have formed on your neck.
14. If everything is perfect, turn your top back on the back and fold the neckline in two then make a straight seam to form a small triangle as shown in the image.
15. Return your top to the place to check that your neckline is well.
16. Carry out the hems of the sleeves and the bottom of your top.

Your top is finished! You can proudly put it on, you are ready for summer!


