My trendy bucket bag
This week ends in style, first with a superb pun, but especially with a super trendy and fashion bucket bag. It’s a little more advanced tutorial than what we’ve offered you lately, but we know you'll get there without worry. It is a very practical bag and above all perfect for customization. You can mix different materials and prints, this time it's you the stylist!
Supplies :
- 50 cm of UNE cotton
- 70 cm of printed cotton
- 50 cm of medium -sided
- 8 Silver eyelets
- 2 Metal curls
- A wire reel matching
- A pair of scissors
- A rule / square
- A Craie tailor
- A pins box
- A sewing machine

Step 1 Cut your pieces:
- Position the different parts of the pattern on your fabric and cut according to the indications presented in the PDF below.
Either :
- Circle pattern: 2 times in united cotton / 1 time in thermocollant
- Patron of the small rectangle: 1 time in the united cotton / 1 time in the heat
- Patron of the average rectangle: 1 time in printed cotton / 1 time in thermocoling
- Patron of the large rectangle: 1 time in the printed cotton for the lining.

Step 2: Attach the heat cell:
- Set the heat -upper, on the back of the corresponding piece of fabric, with an iron. This will give your bag good hold.

Step 3 Assemble your pieces:
- Take the large rectangle of the lining, fold THE In half, place against the place and assemble with a straight seam 1 cm from the edge. You should get a cylinder.
- Once heat up, assemble the small yellow rectangle with the medium rectangle printed place against the place. Then fold it in half and make a straight seam 1 cm from the edge.

- Pin your circles with your large rectangles place against the place 1 cm from the edge. Remember to assemble the heat -bogged pieces together and the non -thermocoléed pieces together.
- Return your two parts and iron the seams. Then Park a hem of 1cm at the top of these. Insert the lining into your bag and close everything with a stitching on the side of the right backwards.

Step 4: Finishes:
- Place your eyelets using a hammer (here we put 8 eyelets). Remember to measure the distance between your eyelets so that they are all equidistant.

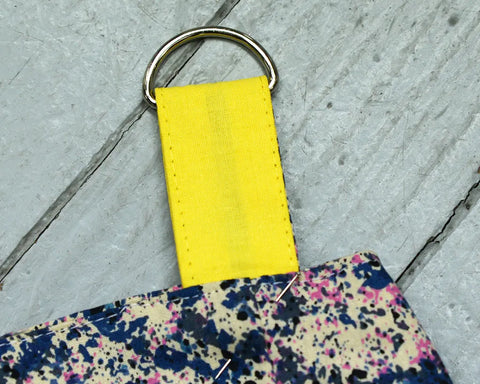
- Now create the straps by cutting two rectangles 2 cm wide and 10 cm long. Cut these pieces once in the plain cotton and in the printed cotton. Now you have to sew both places against the length and turn them over. Return your straps to the place, pass the metal curls in it in the middle and attach everything to your bag.

- Now you need to create your shoulder straps. You need to cut, in your two fabrics, a long rectangle 2cm wide for 120 cm in length. Now you have to assemble these two pieces against the place. Now turn your piece over and iron the property flat. Then insert the strap into the metal curls and assemble at the desired length.

- To finish take the choice of piping, bias or a ribbon and pass it through the eyelets. This will close the bag.

And here you have finished your superb SO Fashion bucket bag! All our congratulations we can't wait to see your achievements on the networks so do not hesitate to post your bucket bags with the hashtag #lesouponsdesaintpierre.


